Tuesday, October 30, 2012

sharing pirates

Pin It

*** First and admin note.  It has come to my attention that it is not always clear which of us ladies are writing each blog.  We try to use the "label" function to label each of our posts, but that is at the bottom of the post, so I can understand it would not be obvious.  So, I (Major Moma) am going to try to identify myself right away in the posts I (Major Moma) write.  I will do so with the parenthesis and my name and use a different font. 

You may also notice it is me because I have started to color some of my words according to the theme in my head.  I don't know why I do it, but it is fun.****


OK, on to the post. 

One of the best things about having a cool or special gadget/talent/space, is being able to share it.  So when my friend asked for my help on her soon-to-be 4 year old's birthday party, I was excited to be a part of it.  I was not a ton of help but we brainstormed ideas for a fun pirate party.


And I volunteered to embroider shirts for the Birthday Boy and the guests.  My Friend bought a couple of packs of t-shirts and gave them to me to decorate.

I bought two different embroideries.  The one for the Birthday Boy that was an image of a boy dressed up as a pirate.  Super cute.  And all the other kids had a skull and cross bones embroidered on their shirts.  I made most of them classic black.  But for some of the girls, I used hot pink.  Or, shocking pink as my daughter calls it.


My friend bought a package of 4T and a package of XS t-shirts.  According to the package, the XS should have been one size bigger than the 4T.  However, they were simply 1/2 inch wider and not any longer.


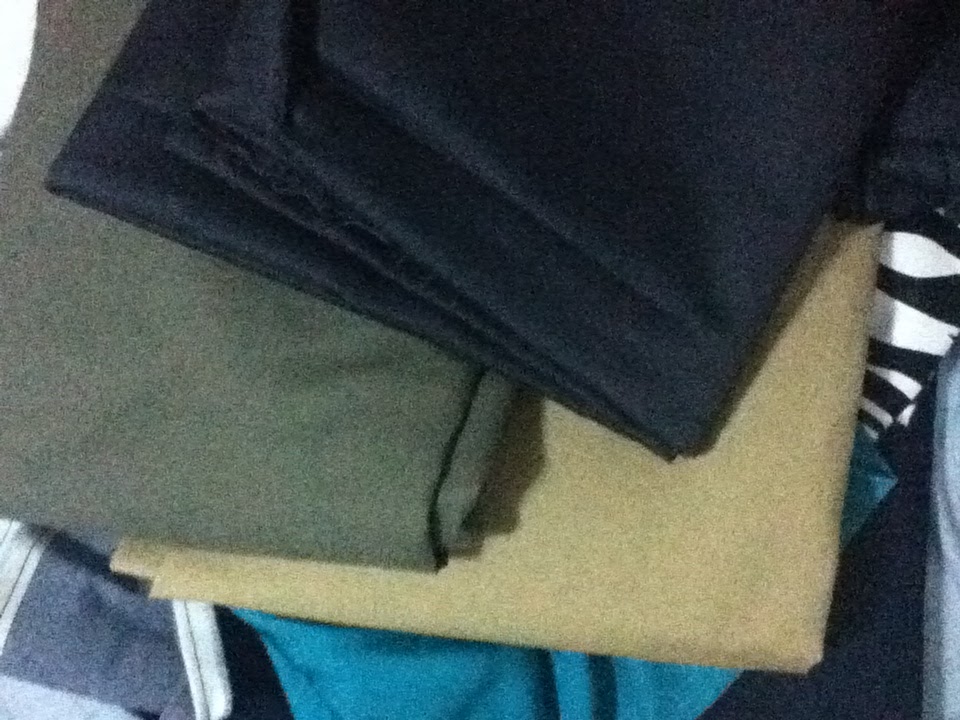
So, I searched my stash of scrap knit fabric to see if I had anything to add as a band on the bottom to lengthen the shirts for the bigger kids.  As it so happened, I had a some skull and cross bone knit fabric that was exactly the same weight as the t-shirts.


fun and exahsting day

So, if you ever have this issue, you can lengthen the t-shirt by cutting a strip that is as long as the bottom of the t-shirt + seam allowance.  And make sure it is twice the width of what you want the finished band to be.

a battle with "real" pirates


Then, you sew the short ends together to make a loop and press it in half, wrong sides together.  Finally, line up the raw edges with the bottom edge of the t-shirt and sew around the bottom. (I used my serger but a zig-zag stitch would work too.)  Then press the seam toward the main body of the shirt and you have a nice contrasting band.


other fun pirate accessories that other creative women made

 The girls and I were sick that day, so only the husband and Eli were able to actually attend and participate in all that pirate fun.  But, luckily, my husband can tie balloon animals/things so he came armed with many balloons and he made parrots for all the little pirates.

From all reports, it was a fun day!


Sunday, October 28, 2012

The Lure of Alchemy...

Pin It
I can remember being fascinated by the stories of the medievial alchemist.  All they had to do to have untold wealth and power, was to magically turn lead into gold....  In other words,  turn something with little value by magic or science into something of great worth.

Well,  I experienced a little of the alchemist's joy today.

My sister collects things that have great beauty to her.  Others(like me) may not see with her artist's eye. But she sees it and envisions all that this beautiful object can be.  Well a couple of weeks ago V  gave me some fabric samples that she picked up.  They had no value, someone just gave them away, but V knew that thes beautiful pieces of fabric would make something wonderful. " M,  would you help me sew some bags out of this beautiful fabric I found?"    Ok....


V wanted some grocery bags...  Most of our local stores no longer can provide plastic bags so its bring your bag no matter where your shop,  groceries, clothing... everywhere.  I usually forget to bring bags with me, so I am object juggling when I go shopping. 


So I started working on her bags last night... and woke up early to finish.  Why?  BECAUSE I WAS TURNING SOMETHING WORTHLESS INTO GOLD!

Very fun, and very satisfying.

M    aka  The Alchemist.

Thursday, October 25, 2012

sewing for the body I have

Pin It When I was on my third pregnancy, I frequented a wonderful fabric shop in Charlottesville, VA (Le Fabriques).  The staff there are just wonderful and they became my friends.  (this just tells you how often I was there.)  When I was several months along, one of my friends/employees was just amazed at my size and we were joking around about it.  See, I am on the petite end and my belly was quite large.  Quietly, she told me, "I just don't know how all that skin can go back."  I laughed and said that I was not sure that was possible either.

me, only 7 months along ... 3 more to go (and no pictures)

Now, that baby girl is 19 months old and no, my belly is not the same.  I have lost the weight most everywhere else.  But I still have a belly.  An awkwardly wrinkled belly.  I know... I am being quite graphic here.  But this blog post is not for the feint of heart.  We must be big girls today. 

As I stated on an earlier post, I am ready to do some sewing for me.  But that means I need to altering the pattern for me.  That means I have to take the "normal" shaped pattern and make it shaped to fit my body.  My body with the left over belly.  Here is the point where I must be honest with myself.  It has been 19 months since giving birth and I don't know how much more of that belly, if any, is going to disappear. 

And what should I do?  Wait a few more months before sewing for me?  No.  I am going to be a clearheaded woman and make myself clothes that fit the body I have now.

First, this involved measuring.  I followed Gertie's instructions in her book and took some measurements to see what size would best fit me.  Surprise, surprise, my hip size places me 2 sizes smaller than my waist size.  So, there are a few adjustments need for the pattern. 

I traced the pattern and made my adjustments.  Then I did a pin fit of pattern on my body.  This is when you mark your seam allowances and pin as if it is sewn.  Then you hold the pattern (as it is half of your garment) against your body as if you are wearing it and see if the center lines match your center.  If it doesn't match, you make more adjustments.

When I got what looked like a good pattern, I cut this awesome fabric.

I then sewed all the darts and basted the side seems to check the fit.

It was too tight.

I debated on whether to just have smaller seam allowances.  But then just decided to cut new back pieces that were a size larger.  I had extra fabric and figured I will just make pants for the baby girl out of my 'wasted' fabric.

Again, I basted side seems.  This time it was a tiny bit tight.

So, I let it out a tiny bit just in the places it was needed.

Next, I do the zipper.  I will keep you all posted.

And for the rest of you, I hope you all are brave and sewing for the body you have, not the one you wished you had. 

Monday, October 22, 2012

Me? Vintage?

Pin It Whewhh...

That was a lot of kid sewing the last couple months.  I have been sewing almost non-stop since the beginning of August in order to complete a school wardrobe for Abi and use Project Run and Play to supplement Eli's mostly hand-me-down wardrobe.  I also threw in a little Isa sewing to fill in some gaps in her wardrobe.

Well, after all that kid sewing, I am ready to do some sewing for me.   I have a loose plan and have already started to get a couple projects done.

My friend who lives in Korea sent me a bunch of fabric for the kids (good fabric is really cheap there) and there is plenty left over.  And I have some left over from a big order from Fabric.com that was meant for Abi.

Next, I started thinking of what types of projects I wanted to make.  I pulled out a bunch of patterns and was automatically drawn to several patterns that I received from my Grandmother.  These were patterns she used a lot and she not only sewed them for her family but she for which was a pattern tester.

I gathered up some fabric and choose one of Grandma's patterns and sewed up this cardigan.

I loved the way it turned out.  It is a thick sweater knit/lace.  I used it for some leggings for Abi but had a ton left over so it was perfect with this project.  I sewed it with my serger (other than the hem) and that really is the only way to go with this fabric.  It would have been a real pain on a standard machine.  I used purple transparent buttons and bias tape (home made left over from Abi's not-so-biased skirt) for the facings.

I am going to have this sweater be my IP project this month.  I had Eli (yes, the 4 year old) take the picture in a place that had a lot of the same colors as the IP photo and I think it is a good fit.  I have another idea for an IP project, but it may or may not be made in time, so we will see...

Since I loved it so much, I decided to try it a different way too.  This time I used a very light weight zebra sweater knit.

Instead of making a cardigan, I cut the front on the fold, just like the back and then cut a band to finish the neck line.  I LOVE this sweater.  I made it big enough to go over a blouse or long sleeve T. but I have been wearing it all on its own.  I figure it will be a useful extra layer as the weather gets colder, but for now, I am enjoying how this soft fabric feels on my skin.
At this point I was quite giddy with my fabulous new sweaters so I pulled out several more of Grandma's patterns and my new book that arrived in the middle of PRP.
This picture is not great, but there are several cardigans, dresses and a skirt in those STRETCH & SEW patterns and Gertie's book.  Gertie is a big time blogger and she sews up vintage clothing and designs modern clothing with a heavy vintage look.

I have read the book all the way through now and it is a fun read.  The first 2/3s is all how-to sewing stuff.  She definitely takes your techniques up a notch with a lot of hand and couture techniques.  The last third are her patterns.  I am going to start with the Pencil Skirt and then move to the Wiggle Dress and then I will either sew up the Portrait Blouse or Shirt Dress.  We will see.

So, For the next couple months, this is what you will see from me.  And it is funny, I have never thought of myself as a vintage clothing lover.  But, my choices on what to sew right now, certainly are vintage.

Friday, October 19, 2012

Hat and Pants

Pin It I am really wanting to get some sewing done for me, but  I have a couple more kid items that need completed.
 Eli needed one more pair of pants for the winter so I made him these:

Ottobre fall 2007 pattern
They are basic jeans from a pattern I have used many times and as usual, they turned out great.  to make them have more color, I used red thread for top-stiching and a bright red snap.  The only issue was when Eli saw them hanging up with the creases. 

"I don't like those lines on the legs!"  But we felt a lot better when I told them that I only ironed them that way and they would be normal when washed.  Silly boy!

With the remainder of the fabric, I made this hat.  And I lined it in red flannel so it would be warm for the winter.


Melly Sews Gatsby Cap
It is a Melly Sews free pattern and was easy to sew up.  I had been looking for a driving cap for kids for a while and was excited to try it.  I liked the way it looked, but the fit was not great on my kids.
Eli was not very thrilled with it but he did let me take a picture of it on his head.

I then tried it on Abi and she said she liked the concept but it was too small on her head; it easily slipped off.
I don't have a picture, but Isa liked it a lot but she wore it really silly with the front popped up.  So, I would recommend it if you want to see if it fits your kiddos, after all it was free.  But I will have to continue my search for a driving cap for kids.

Tuesday, October 16, 2012

Life is good.

Pin It I had all sorts of things I wanted to blog about last week, but life was just too full for blogging.

The family took a train to a Wine Festival in a town not too far from where we live. 


There we ate, drank and the kids rode on carnival rides.


We then had family activities at the house, regular work schedule and kid activities all week.

I took my physical fitness test and completed 73 push-ups in two minutes, 80 sit-ups in two minutes and ran 2 miles in 15:03.  I was quite excited about that run time.

I received an award at work.


The husband left on a men's retreat and I had the kids to myself all weekend.  We cleaned the house, participated in a fun run, attended a birthday party, had a sleep over, and somehow made it to church on time.

Also, last week was an online sewing event called Kids Clothes Sewing Week Challenge that is hosted by a blogger named elsie marley.  She basically challenges people to sew an hour a day on kid's clothes and then share in her flickr group what they accomplished.  It is a fun way to challenge people and to get lots of good ideas.

for Abi
I have been busy sewing for weeks with PRP, so putting in an hour a day was business as usual.  But then life go busier, better, and just plain exhausting.  So on Tuesday I mainly just cleaned up the sewing room and planned the next set of clothing and I took Wednesday off from sewing. 


for Isa

for Isa

for Isa
But I did get some projects completed.  The jeans are from the robot outfit for Eli and the three shirts are Isabel's.

for Eli

After that full and exciting week, I just have to say that life is great

When I was in high school, I also went to community college part time and was considering not taking HS classes and simply go to college full time.  One well meaning adult advised me not to do so.  He said, "High school is some of the best years of your life.  You don't want to miss them."  Well, at the time I took his advice but also thought that it was just depressing. 
First, HS was not really that great.  Second, I knew I had a lot of years of living ahead of me and I did not want to believe that this is as good as it gets.  Well, that well meaning adult was WRONG.  Thank fully so.

These are the best years of my life, so far and I am excited to see what else life will bring.  I have certainly many challenges in my life but I have a wonderful husband, been entrusted with these neat people I call my kids, and work is incredibly fulfilling. 

I am glad that I am able to share many of these experiences with you through our blog but I am also glad that sometimes I am too busy and too tired to do so.  Because I am sometimes too busy just living.

I am telling you, the 30s are pretty amazing.


Monday, October 15, 2012

Who's style is it anyway?

Pin It
It is the last week in this season's Project Run and Play and as always, it is the free-for-all of Signature Look Week.  Eli need a few more clothes, so I continued to sew for my boy.  I now have made two "signature look" outfits so I am pretty sure I know what my look is, and is not.  But it is a good exercise to evaluate "what is my style" and "what makes my clothes special".  Then again, I am not wearing these clothes.

These clothes will be worn by my boy who has a style of his own.  His clothing requirements are:
  • comfort
  • playability
  •  color
  • silliness
So, for this look, I decided to really focus on the things Eli likes using some of my favorite go-to patterns.  And then to put my own spin on things, I challenged myself to change up each of the patterns in a new way (new for me).
I started with a basic T-shirt.  I used my standard pattern and added a turtleneck and a robot machine embroidery.  What I came to find out, is that this standard pattern is now too small.  The boy has grown.  So this shirt will quickly become a hand-me-down and I need to draft a larger t-shirt pattern.

pant front


pant back
Next I made some great, basic jeans.  I used the Melly Sews, Blank Slate pattern but placed patch pockets on the back instead of welts and used a contrasting bias tape on the inside of the hem so that they can be cuffed.  (I did not make the same mistake as the shirt and not allow room for growth.)  I also added belt loops and made a double loop in the back center. I top stitched the heck out of these pants with a double needle and contrasting grey thread.  The fly is a zipper fly and snap closure.
Eli helped with the photo shoot and took this detail shot while wearing the sweatshirt.
As you can see, the pocket is lined with the same fabric as the turtleneck.
Next, I made a sweatshirt.  This is an Ottobre 2007 Fall pattern and I use the patterns from this magazine again and again.  To change this one up, I exchanged the kangaroo pocket for welt pockets, used an exposed zipper, and made the zipper not go all the way up the hood.  I have just loved using the iron on vinyl the last couple weeks so I added this adorable robot in flocked grey.

strike a pose!
nice and warm
"see my pockets?  they have ROBOTS"
Like I said, the turtleneck was a bit too small, so I made a snap-placket closure on the neckline.  And Eli liked it better open, so that is how he wore it. 

The baby, Isa wanted to be in the photo shoot too and of course, I let her.  That last picture has her doing her best "camera smile".  I actually have a blog waiting to be finished about the shirt she is wearing, so I guess this is a 'sneek peek'.


Tuesday, October 9, 2012

PRP - Holiday Where?

Pin It This week's PRP challenge is to design FALL Holiday wear.  Now this is a bit tricky for me ...

I do not live in the USA.  So, though I am an American, celebrating holidays that are purely American is not the same.  And though I love doing a good costume, Halloween is not very big over here, and I already completed the kids' costumes.

I gave the potential holiday themes a bunch of thought.

... I could go German and celebrate Unification day (3 October).  But German flag/patriotic outfits are a bit weird on American kids.

... I could go minor and celebrate Columbus Day.  This would be fun as I have three kids ... My own Nina, Pinta, and Santa Maria.

But, I finally settled on a Halloween outfit that would not scream Halloween and focused on my favorite October candy.  The candy corn.  I designed a full outfit for my boy but also made a coordinating shirt and vest for my eldest.

I made a yellow fleece vest with white ripstop fabric on the shoulders. The collar is extra large to be popped up on cold days to protect his skinny neck from the weather.  The shirt is a up-cylced men's t-shirt that I cut to bits and made a t-for him.  I used iron that is glow-in-the-dark vinyl for the spider web and machine embroidered the spider in orange.  The orange pants are a heavy weight corduroy and they are a slack style (darts, tab front, and zipper fly).  They have a slight taper to the leg and have optional cuffs.  The front pockets are bag style and the back are welt; both are lined with black. 
 Do you see the Candy Corn influence?


Abi's is similar but she did not get new pants.

Her shirt has a large purple spider coming down from the top going to the web down in the lower corner.

These outfits are perfect for fall outings.  The fleece vests provided just enough warmth for the cool Autumn breeze but also allowed them to play without over heating.

I loved seeing them all coordinating too.  That is something I do a lot when I do my "holiday" sewing.  But that is usually for Christmas and Easter so it was fun to change it up a bit and make coordinating casual outfits.

And because the outfits are more Fall Festival, than Halloween, they were perfect for going out and about celebrating at local German fests.  Thus, I have named these FEST Outfits... in honor the the German fests.  If you did not know, virtually all German towns have a fest celebrating something in the fall.  It makes for one long holiday season! 

For more pictures, check out my flickr page.

Thursday, October 4, 2012

Pattern review: Pristine Swing Dress

Pin It
I recently tested a pattern for Mellisa of Melly Sews.  She has released two new pattern collections, one for boys and one for girls, using the name Blank Slates.  Her idea is that it would be nice to have a pattern collection that is made up of great basics that can be easily altered and/or embellished for multiple different looks.  I especially like her boy collection as it is hard to find great boy patterns.  I have used the pants pattern and already have a plan to do so again (probably this weekend).

But the pattern I tested this time was for the Pristine Swing Dress.  (It has a tunic length cut line too.)  It is a fun little pattern because it combines woven fabric and knit fabric. The main body is knit, and the accents are woven. 

front


front detail
I used a knit that I had  bought cheaply years ago that was still sitting in my stash.  And there is a good reason for it still being around.  It is not a nice fabric; there is a reason I got it for next to nothing.  But since this was a pattern test, I thought it would be a good use of the fabric because if I did not like it, I would not feel like I wasted it.
For the contrast, I used some scraps from an outfit I made this summer (here).  I had picked up some matching ribbon when bought the fabric, but when I made the outfit, I opted for sparkly green rick rack instead.  So, when I saw that the dress turned out cute, I decided to use the ribbon on the hem to add to the cuteness. 
The back of the dress has a small placket closure with a single button.  I used  a large red heart button I had lying around.
back
 OK.  Time for the pattern review.  This pattern is bought online and you down load a PDF file and then print the pieces on regular 8.5x11 sheets of paper.  You then tape the paper together as explained in the instructions and cut your pieces along the size line you desire.  I like this sort of pattern shopping because it is instant and if I want a new size later, I just reprint, tape, and cut the new size.

Melissa includes very good instructions with lots of pictures that show each step along the way.  She is a former teacher and it shows in the clarity of each step.  If you are new to sewing, this pattern would be great for you.  You would learn skills like gathering, yoked bodices, and creating a simple placket.
The sleeves are sewn to the shoulders and then you sew down from the wrist to the hem in one long seam.  This is an easy technique that I use for all my t-shirts and makes for simple construction.  (no dealing with set-in sleeves)  The pockets are lined and trimmed with your woven contrast fabric and were my model's favorite part of the dress.

So, I completely recommend the purchase of this pattern.

For you ladies out there, if you like this style, she has a pattern for a woman's t-shirt with the same neckline.  I have made that one too and it turned out great.  I think it would be a fun opportunity for some color blocking that is so popular right now.
01 09 10 11 12
Blogging tips